Blue and white $5 scarf

$5 Awesome Scarf

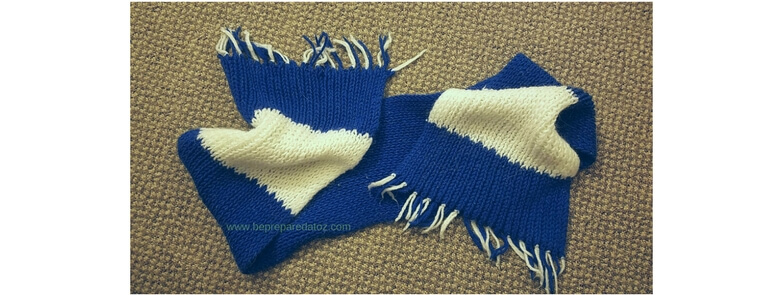
A Better Scarf for Less

The problem

I was talking with a lady I met some time ago and she was concerned for her daughter who, because of health issues, can become seriously, painfully, chilled in a 75 degree room, even when it’s 90 degrees outside. This mother was also concerned, because her daughter could only endure a few minutes outside in the winter before the symptoms begin to negatively affect her and she needs to return to the safety of the indoors and warmer temperatures. (Is my $5 scarf a possibility?)

Options in dealing with the problem

After a brief discussion of layering, and the need for the right material in the layers, it was clear to me that a very specific and important item was missing from her arsenal of cold weather protection. That missing item… …was a quality scarf that would offer great protection particularly around the neck and head at a price that anyone can afford. This post is all about making your own high quality scarf for less.

The Materials

 The Loom/Frame

2 skeins of yarn – (any color any material. I prefer acrylic)
1 crochet hook – Your choice of size. My go to is a 0/3-3.25mm, but I have used a piece of grapevine carved to meet the need of the moment.
That’s it. Oh, time and a little patience. (Safety equipment like safety glasses and a first aid kit are assumed expectations when making any project)

The Process

Making the Loom

Materials
____ 1 ½ inch finishing nails
____ 1×2 lumber cut into pieces
____ glue (optional)

Making the loom is a process that requires little experience or technical knowledge. It requires very little in the way of tools, (The loom pictured on this post was made with “camp” tools).

Cut the pieces

To start, you will need 33 ½ inches of 1 × 2 stock. This will be cut into 4 pieces. 2 of these pieces should be 15” long and 2 pieces should be 1 ½” long. These pieces are then nailed together so that there is the ¾” gap between the long boards with 1 small block on each end used as “spacers.” Glue can be used if you want, but it is not required. When these pieces are put together they should create a frame.

The gap and nails

The gap in the middle should be about 12” long. Take a pencil and draw a line down the middle of each outside board. Beginning at the edge of the gap place a mark on the line. This will be where the first nail is placed. Measuring every ½” down the board, mark where the rest of the nails will be located. Do this on both sides. There should be 24 nails on each side.

Making different widths of material

Material made on this loom can be made wider by making a longer gap. This is accomplished using longer boards and more nails on the outside and keeping the short blocks the same size. When all 48 nails, (both sides), have been hammered in about ½ way, it will be time to straighten and align the nails. The nails should have a slight slant toward the outside of the loom with the same angle and height as the nail next to it. They do NOT have to be perfectly aligned! (Close is good enough. Some gentle sideways persuasion from a hammer will bring those nails in line). The yarn is easier to work with when the nails are aligned. Trust me the scarf won’t know any better.

Working the Yarn

The first step is to think about the end game. If that sounds counter intuitive, it is, but trust me this is an important step. Decide on your fringe first. The fringe cannot be too short or the scarf will fall apart over time. If the fringe is too long, it becomes a nuisance. In my experience, 3” fringe is nearly perfect. The next step is to figure out if the fringe will be mixed colors based on the colors in the scarf or one color or some strange mix of complementary color found nowhere else in the project.

Cut The Fringe

The imagination is a wonderful tool for this scarf project. Once the length and color of the fringe have been determined, it’s time to cut the fringe. For 3” fringe, cut 48 pieces of yarn 6” long. (I cut 52 just in case something happens, I have a few extra.)

Why cut the fringe first?

The reason is that if you wait to cut it until the scarf is completed, several rows of “webbing” may have to be removed to make the fringe. This compounds the work and time making the scarf. The pieces that have just been cut should be protected in something like a Ziploc bag or plastic container. The fringe literally is the last step in making the scarf, as it allows for the removal of the scarf from the loom and holds the final product together.

And now… …the scarf itself

Begin by tying an overhand loop, also known as a loop knot, in the working end of the yarn. The finished loop should not be more than about ¾ “ -1” long. This loop is the anchor for the first “web.”

With the frame sitting lengthwise in front of you, hook the loop over the end nail closest to the primary hand used for hand work. Right handers will start with the lower right nail and left handers the lower left. Then, using every other nail and keeping the yarn near the head of the nails, begin going back and forth across the loom, maintaining a steady pressure, all the way to the other end of the loom. Carefully, go straight across to the other side at the last nail and return to the beginning point. Wrap the yarn around the end of the loom several times to hold the tension that has been built up. Push the first web down to the bottom of the nails.

A second layer of webbing

Create a second layer of webbing just like the first layer. This layer is added at the top of the nails over the layer you just pushed down to the bottom of the nails. The next step is generally the most time consuming AND it’s the easiest part to mess up. The goal is to take the “loops” from the bottom webbing and bring them over the top of the webbing at the top of the nails. This step is the “knitting” step. This process of pushing the webbing at the top of the nails down to the bottom after the bottom loops have been lifted over the top webbing is continued until 2 skeins of yarn have been used or it is a comfortable length for the end user.

The Great Finish

Once you have the length of scarf needed for that special someone, it is time to finish the scarf. Tie off the working yarn with several square knots to make sure that the material will not come apart. Then, remember the fringe pieces that were cut in the first step and saved for later? Well, it is time to break them out and finish this scarf.

Fringe

To start, take a piece of fringe and fold it in half. A 6” piece of yarn is now a 3” loop. Next lift the 2 loops that are immediately opposed to each other off of the nails using your hooking device. Use the hook, upside down, to hook the center of the loop and pulling it through both loops of webbing. You should be holding the fringe piece now with both hands or at least a hook and the other hand. Carefully open the loop end of the fringe piece and insert the loose ends together into that loop. Get a hold of the loose ends and pull it tight so that the fringe loop holds very tightly to the loose ends. Repeat until all 24 sets of loops have been removed from the loom.

Half Done

Now that end of the scarf is done. You have tied it off and put the fringe on at the same time. The other end of the scarf now needs some attention. To apply the fringe on the beginning end, it is best to look for the “X’s.” Insert the hook through the X and tie the fringe loops just like on the other end. Remember to gather the end loop into one of the fringe pieces, (See note below about the End Loop). When you have done about 24 of those fringe pieces, YOU’RE DONE!!! (Check these videos, I think they will help visualize the finishing of the scarf)

Part 1 – Finishing the scarf and removing it from the Loom

Part 2  – Finishing the Scarf on the Beginning end

SIDE NOTES:

The End Loop

The end loop on the first layer of webbing after lifting off the loops over the second layer of webbing. This loop can be your friend or your worst nightmare. When you take the yarn off of the last 2 nails, there will be a single loop that does not seem to go anywhere in particular. This loop should be coaxed down into the gap between the long boards. Do this coaxing for several layers of webbing. Do not let it ride up and/or across the webbing in these first few critical layers. If it does ride up, the corner of the scarf will begin to come apart.

If a “loop” is dropped

Occasionally, a loop may be missed and or come unhooked from the webbing above. This can lead to headaches. These are easily cured by following the directions in this short video

Changing colors

Changing colors is as simple and tying a square knot with a backup knot of some sort. This knotting process should leave a relatively smooth finish. The knot should be small and tight so it will not come apart easily. Personal taste will dictate how often to change colors. Also, I like to change colors at the end of a web layer so that the rows appear even. Some people like to change the colors in the middle or in varying locations to create designs. Follow the design in your head and be CREATIVE!!! Another interesting effect is created by using multicolor yarn.

$5 awesome Scarf square knot to add yarn
Square knot to change color or add yarn

$5 Awesome Scarf Read More »